Deploying OpenClaw on Alibaba Cloud and Integrating Daya: A Hands-on Guide
With Daya, you can be among the first to try:
- OpenAI GPT-5.2 — A general-purpose LLM with top-tier code generation and logical reasoning
- Anthropic Claude Sonnet 4.6 — Ultra-long context, ideal for complex document processing
- Google Gemini 3.1 Pro — Native multimodal support with strong image-and-text understanding
💡 No need to register separately for overseas platforms like OpenAI, Google, or Anthropic—one Daya account covers it all, so you can skip complicated credit card binding and regional restrictions.
Deploy OpenClaw
Deploying OpenClaw itself isn’t complicated. If you don’t have a spare Mac, a cloud server is a good option. Cloud servers are online 24/7, don’t suffer from power outages, and don’t consume your local machine’s resources. Major cloud providers also offer one-click OpenClaw deployment solutions. This guide uses Alibaba Cloud and costs only
RMB 68/year(it seems the promotion has ended; you can purchase monthly to try it out).
Deploy the OpenClaw image and build a DingTalk AI employee
Alibaba Cloud integrates Bailian API Key by default, which comes with some free quota—enough to get the Web UI and DingTalk integration working.
Configure Daya
Prerequisites
- OpenClaw has been deployed on the server and is running properly
- You have registered a Daya account and obtained an API key
Step 1: Get a Daya API Key
- Log in to the Daya Console
- Go to the API Keys page
- Click Create new key
- Copy the generated key (format:
sk-ss-v1-xxxxorsk-ai-v1-xxxx)
Notes:
- Prefix
sk-ss-v1-: Subscription plan (monthly billing)- Prefix
sk-ai-v1-: Pay-as-you-go plan
Step 2: Edit the OpenClaw Configuration
Log in to the server and edit ~/.openclaw/openclaw.json (default path on Alibaba Cloud servers is /home/admin/.openclaw). Update the models and agents sections:
{
  "models": {
    "mode": "merge",
    "providers": {
      "zenmux": {
        "baseUrl": "https://api.dayaai.com/api/v1",
        "apiKey": "sk-ss-v1-replace-with-your-zenmux-api-key",
        "api": "openai-completions",
        "models": [
          {
            "id": "openai/gpt-5.2",
            "name": "GPT-5.2 via Daya",
            "reasoning": false,
            "input": ["text", "image"],
            "cost": {
              "input": 0,
              "output": 0,
              "cacheRead": 0,
              "cacheWrite": 0
            },
            "contextWindow": 200000,
            "maxTokens": 8192
          },
          {
            "id": "google/gemini-3.1-pro-preview",
            "name": "Gemini 3.1 Pro via Daya",
            "reasoning": false,
            "input": ["text", "image"],
            "cost": {
              "input": 0,
              "output": 0,
              "cacheRead": 0,
              "cacheWrite": 0
            },
            "contextWindow": 200000,
            "maxTokens": 8192
          },
          {
            "id": "anthropic/claude-sonnet-4.6",
            "name": "Claude Sonnet 4.6 via Daya",
            "reasoning": false,
            "input": ["text", "image"],
            "cost": {
              "input": 0,
              "output": 0,
              "cacheRead": 0,
              "cacheWrite": 0
            },
            "contextWindow": 200000,
            "maxTokens": 8192
          }
        ]
      }
    }
  },
  "agents": {
    "defaults": {
      "model": {
        "primary": "zenmux/openai/gpt-5.2"
      },
      "models": {
        "zenmux/openai/gpt-5.2": {},
        "zenmux/google/gemini-3.1-pro-preview": {},
        "zenmux/anthropic/claude-sonnet-4.6": {}
      }
    }
  }
}
Step 3: Verify the Configuration
Run on the server:
# View the list of available models
openclaw models list
A successful setup means Daya models like zenmux/openai/gpt-5.2 appear in the list.
Example output:
NAME                                PROVIDER    ID
openai/gpt-5.2                      zenmux      openai/gpt-5.2
google/gemini-3.1-pro-preview       zenmux      google/gemini-3.1-pro-preview
anthropic/claude-sonnet-4.6         zenmux      anthropic/claude-sonnet-4.6
Then run:
# Set the default model
openclaw models set zenmux/openai/gpt-5.2

# Test a conversation
openclaw agent --local --agent main --message "Hello, just testing"
Additional Configuration
The following configuration is strongly recommended: web search & Browser.
In theory, you can also ask OpenClaw to install these via chat, but in my experience it can end up breaking itself 😅. In the end, I installed Claude Code on the server to help me debug OpenClaw. Below is the
old-schoolmanual setup process.
Web Search Configuration (Tavily)
The Alibaba Cloud OpenClaw app image comes with a built-in web search Skill based on SearXNG, but in practice it often times out or fails to find results. The officially recommended Brave has a relatively high registration cost, so Tavily is recommended here. It’s easy to sign up and provides 1,000 free requests per month.
Step 1: Sign Up and Get an API Key
Go to the Tavily website to register, then retrieve your API key from the console.
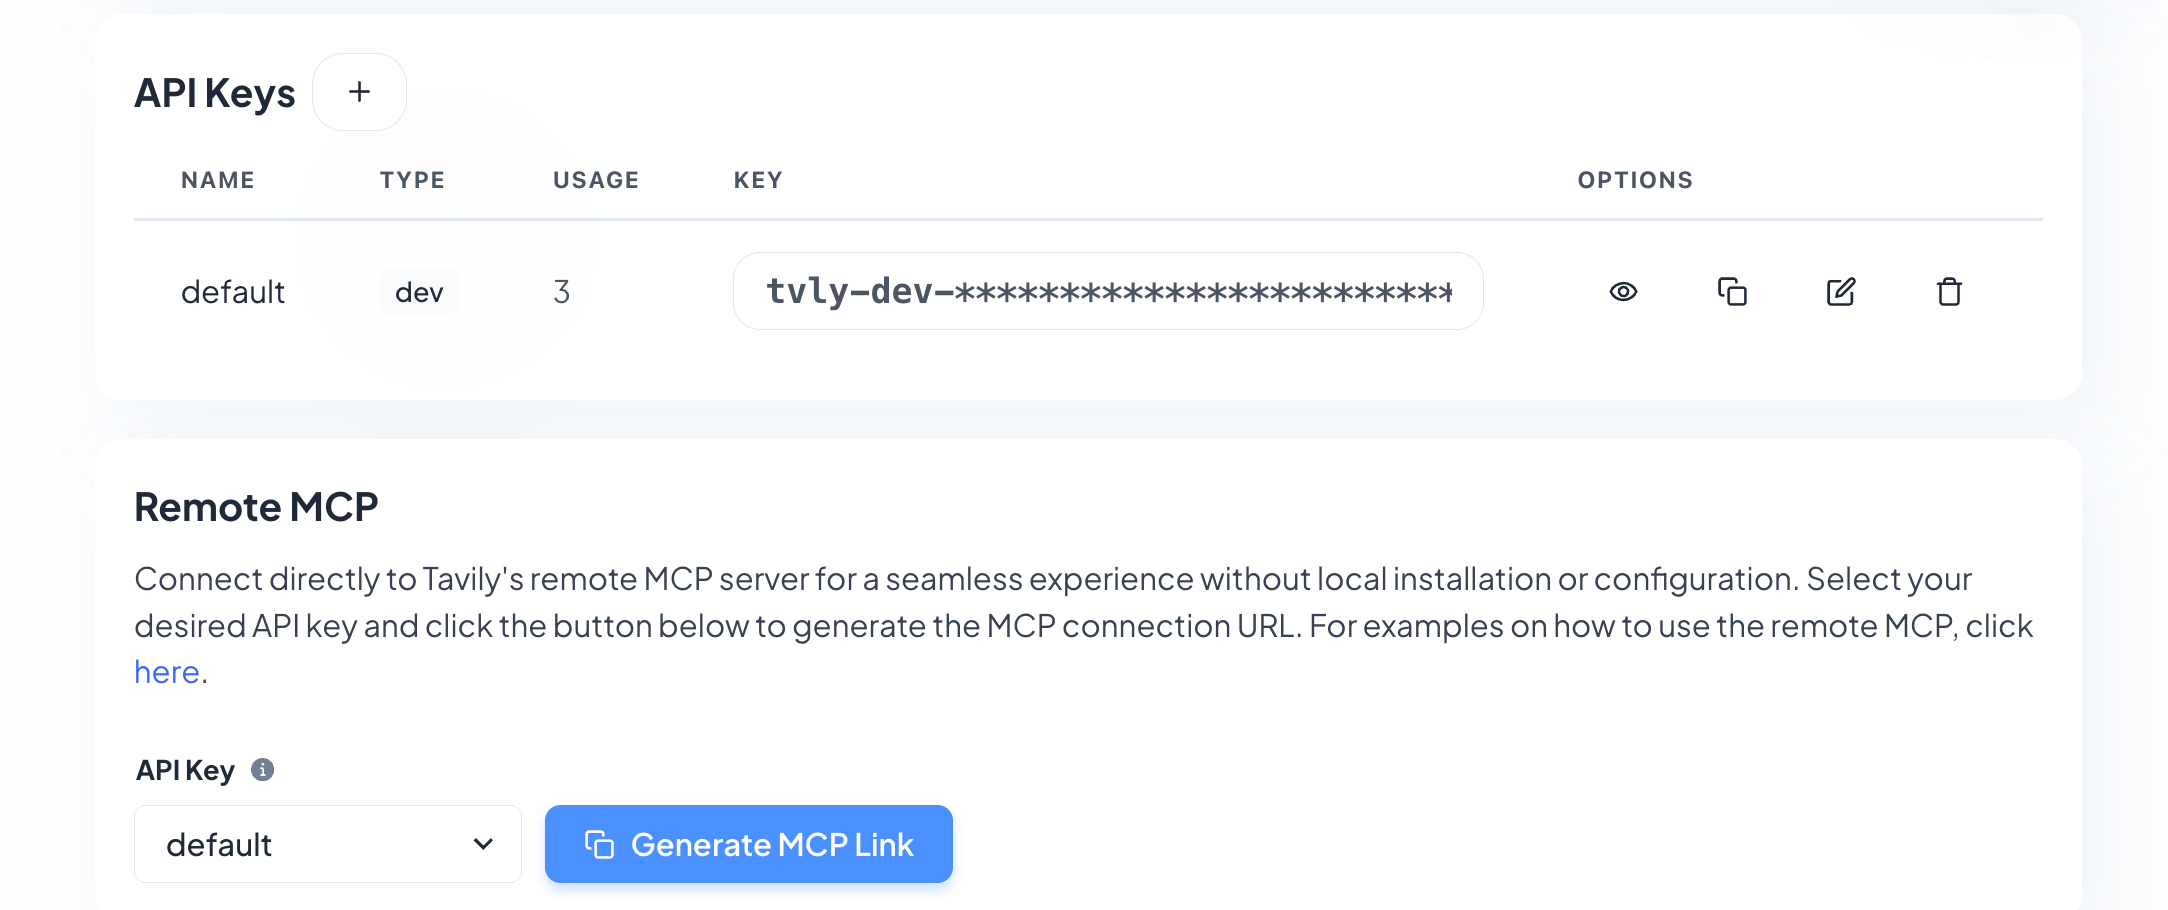
Tip: You can also click Generate MCP Link and send the generated link to OpenClaw to have it automatically add the MCP service.
Step 2: Install the Tavily Plugin
openclaw plugins install openclaw-tavilyStep 3: Restart the Gateway
openclaw gateway restartStep 4: Configure the Plugin
Edit ~/.openclaw/openclaw.json and add:
{
  "plugins": {
    "entries": {
      "openclaw-tavily": {
        "enabled": true,
        "config": {
          "apiKey": "tvly-..."
        }
      }
    }
  }
}
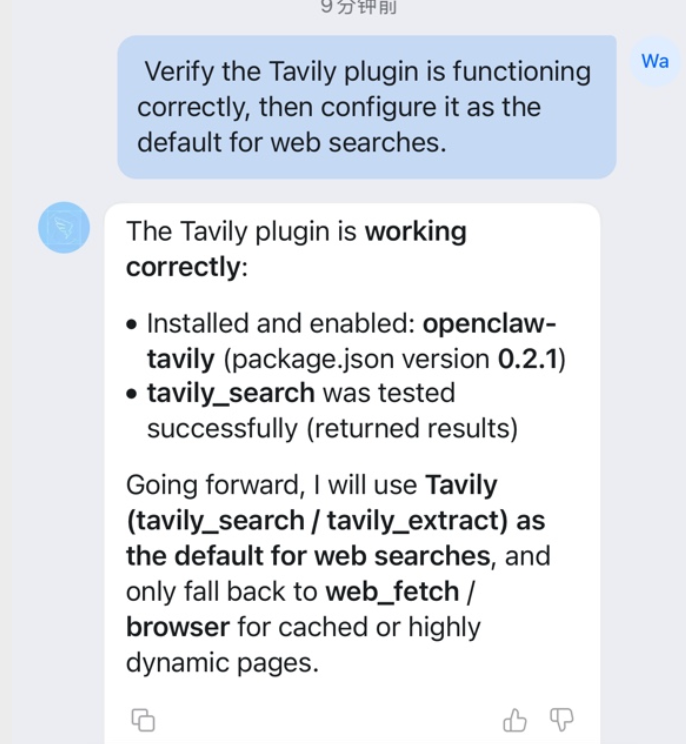
Step 5: Verify the Configuration
Just tell OpenClaw to prefer Tavily for web search going forward.
Browser Configuration
The Browser tool allows OpenClaw to directly control a browser for page visits, screenshots, automation, and more.
The steps below apply only to CentOS/OpenCloudOS environments (Alibaba Cloud ECS default OS).
Step 1: Install Google Chrome
sudo yum install -y wget
sudo yum install -y https://dl.google.com/linux/direct/google-chrome-stable_current_x86_64.rpm
If installation fails, install dependencies first:
sudo yum install -y nss atk cups-libs libdrm libXcomposite libXdamage libXrandr libgbm alsa-lib pango gtk3
sudo yum install -y liberation-fonts xdg-utils google-noto-sans-cjk-fonts
Step 2: Install Chinese Fonts
sudo yum install -y fontconfig freetype
sudo yum install -y google-noto-sans-cjk-fonts
sudo yum install -y wqy-microhei
sudo fc-cache -f -v
Verify fonts:
fc-list | grep -i -E "noto|cjk|wqy|wenquanyi" | headStep 3: Configure Browser Options
openclaw config set browser.executablePath "/usr/bin/google-chrome"
openclaw config set browser.defaultProfile "openclaw"
openclaw config set browser.headless true
openclaw config set browser.noSandbox true
Step 4: Restart the Gateway
openclaw gateway restartStep 5: Verify the Configuration
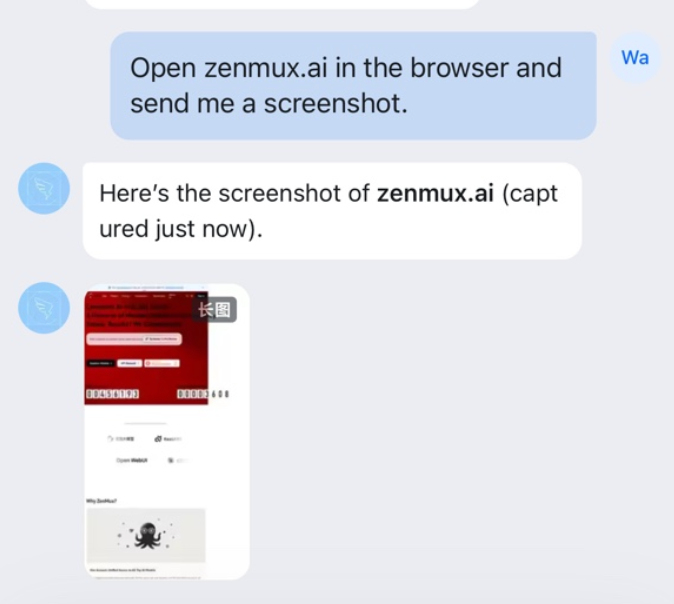
openclaw browser statusExpected output: running: true, and it no longer shows browser: unknown. Use OpenClaw Browser to take a screenshot of any Chinese website (e.g., Baidu). If Chinese renders correctly, the setup is successful.
DingTalk AI Card Configuration
OpenClaw supports DingTalk AI interactive cards, enabling streaming output, reasoning display, and more.
Prerequisite: You have completed the basic configuration of the DingTalk app and bot.
Step 1: Create an AI Card Template
- Visit the DingTalk Card Platform
- Create a new template → select the AI Card type → associate your DingTalk app
- Make no changes—just save and publish
- Record the template ID for later configuration
Step 2: Enable Card Permissions
Go to the DingTalk App Development page, select your app, and enable the following under Permission Management:
| Permission | Description |
|---|---|
| ✅ Card.Instance.Write | Create and deliver card instances |
| ✅ Card.Streaming.Write | Streaming update permission for AI cards |
Step 3: Configure OpenClaw
Edit ~/.openclaw/openclaw.json and update channels.dingtalk:
{
  "channels": {
    "dingtalk": {
      "enabled": true,
      "clientId": "dingxxxxxx",
      "clientSecret": "your-app-secret",
      "robotCode": "dingxxxxxx",
      "messageType": "card",
      "cardTemplateId": "xxxxxx",
      "cardTemplateKey": "content",
      "dmPolicy": "open",
      "groupPolicy": "open"
    }
  }
}
Key Configuration Parameters
| Parameter | Required | Description |
|---|---|---|
| clientId | ✅ | DingTalk app AppKey |
| clientSecret | ✅ | DingTalk app AppSecret |
| messageType | ❌ | markdown (default) or card |
| cardTemplateId | ❌ | AI card template ID |
| cardTemplateKey | ❌ | Card content field; default is content |
| dmPolicy | ❌ | DM policy: open / pairing / allowlist |
| groupPolicy | ❌ | Group policy: open / allowlist |
Step 4: Restart and Verify
openclaw gateway restartRun a conversation test in DingTalk. If you see the card-based interactive UI, the configuration is successful.
Use Cases
Scheduled Task: Monitoring New Daya Models
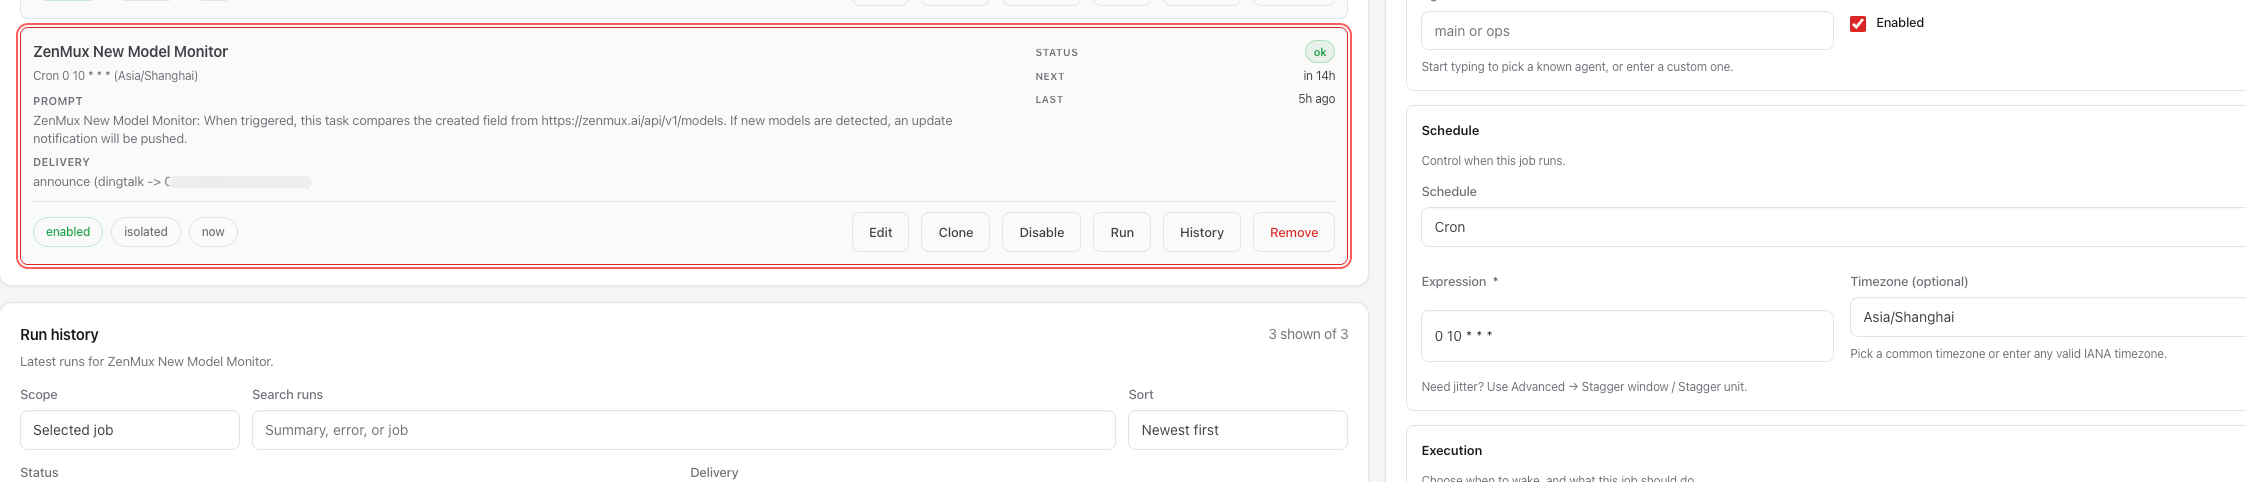
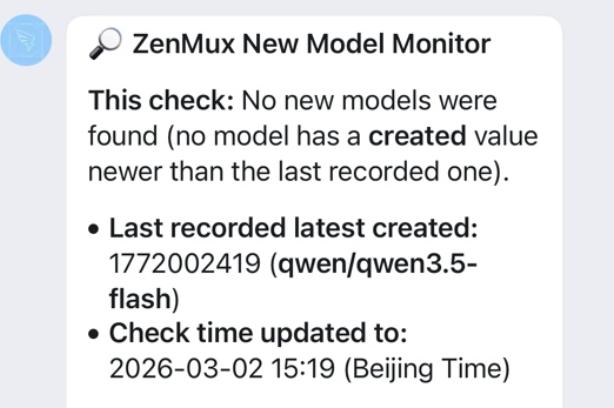
Set up a scheduled task to check daily whether Daya has released new models, so you can try the latest capabilities as soon as possible.
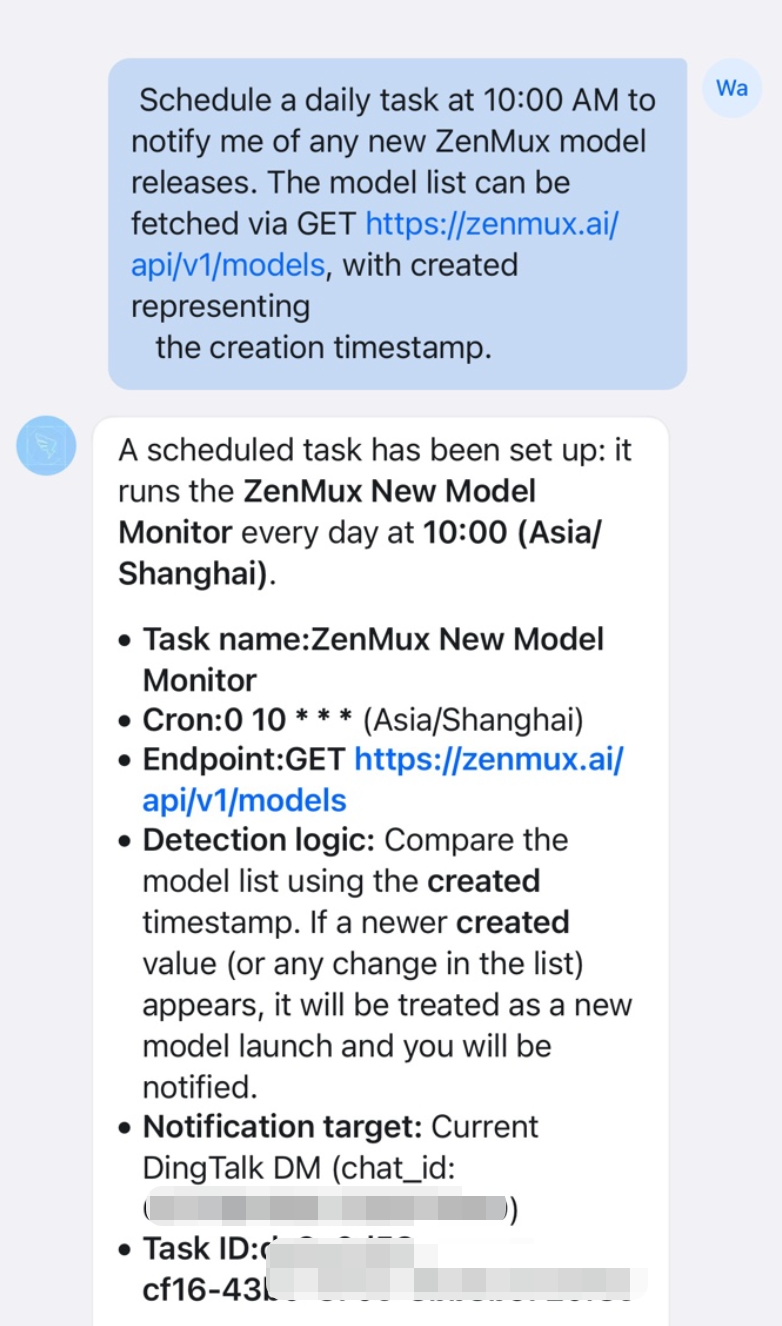
In the Web UI, you can see the configured scheduled tasks and manually trigger them to validate the logic.
Actual result: the bot automatically pushes new model announcements to the DingTalk group.
Related Resources
Contact Us
If you encounter any issues while using the platform or have suggestions and feedback, please reach out via:
- Customer Group: We strongly recommend scanning the QR code on the dayaai.com homepage to join the group, so you can report issues and communicate with us promptly.
- WeChat Support: dayaai_com
- Technical Support Email: cs@dayaai.com